SilverFast - wysokiej jakości skaner i oprogramowanie do obrazowania cyfrowego produkowane w Niemczech od 1986 r.
Negative film is a photo material that, after development, displays the opposite color tone. The development of negative film generates the actual color tone of the image; the image transfers from a negative to a positive. Negative film comes in various sizes. The most common size is the 35mm film cartridge. In the middle of the 1930’s, 35mm film was also given the designation “135”. The film is, including perforation on both sides, altogether 35mm high and depending on photo quantity (12, 24 or 36) can reach a length of 1.6m. The format of 24mm (height) x 36 mm (length) for an image is designated as the normal format and has remained unchanged to this day. Digital camera image sensors with a size of 24mm x 36mm are referred to as full format sensors. Other common formats are 4.5 x 6cm, 6 x 6cm, 6 x 7cm, 6 x 9cm and are commonly referred to as middle format. The 6 x 7cm format is often considered an ideal format due to its appropriate size, fitting to most paper formats. On the market, middle format film has the designation 120, a designation given to the film by Kodak.
Negatives are available in both black and white and color. Besides the fact that black and white film is developed into a positive via tonal correction, there are several other key factors that differentiate black and white from color film. We will cover these specifics in detail.
As mentioned at the beginning, negative film is currently very popular among analog photographers. 35mm Film is available from manufacturers such as Agfa, Fuji, Ilford, Kodak and Rollei to name a few. These manufactures offer films with varying exposure sensibility (ISO/ASA), granularity, resolution and orange masking. A few of these parameters are not only important for photographers but also for analog photo scanning. This will be touched upon in greater detail in the “Scanning” section to come.
Nowadays, negatives are regarded as something special. Older negatives stand for the past; a past we would like to preserve; a piece of history we want to bring into the present. Like nothing else, contemporary analog photography and negatives embody the idea of conscious photography, of decelerating the pace of our hectic day-to-day lives; they embody the idea of manual, technical work with a result that we can hold in our hands.
Of course, this in no way means we have to rid ourselves of the digital world. On the contrary: digitalization provides us with the possibility of making the second step. Digitalization takes the analog, negative image and converts it to a digital, positive image that we can optimize and archive according to our needs, sharing the image with friends and family or posting it online. There are, however, several things we need to keep an eye on, which we will cover on the next page.
The first approach seeks to preserve the original characteristics of the film when scanning. In such cases, the analog photographer usually makes a conscious decision based on a film’s properties when choosing his film. One of these properties is the film’s color, a feature that provides an image with a particular look. For example, the Kodak Portra 400 film produces images with the fairly popular pastel look. Photographers who decide to work with the Kodak Porta 400 to achieve the famous pastel look of course want to keep that look during image processing.
The second approach seeks to produce an image with less intensive characteristics of that particular film. In this case, the goal is not to generate a special film look, but rather to scan the image so that the motif remains as close to the original as possible.
Both approaches have their own personal charm and neither is better than the other. They are absolutely equal in importance and are supported by different settings in SilverFast. Which approach you’ll follow, lies completely in your hands.
In the following, we dive deeper into tonal value conversion, orange masks and typically used tools when processing negatives. This will help to get you started.
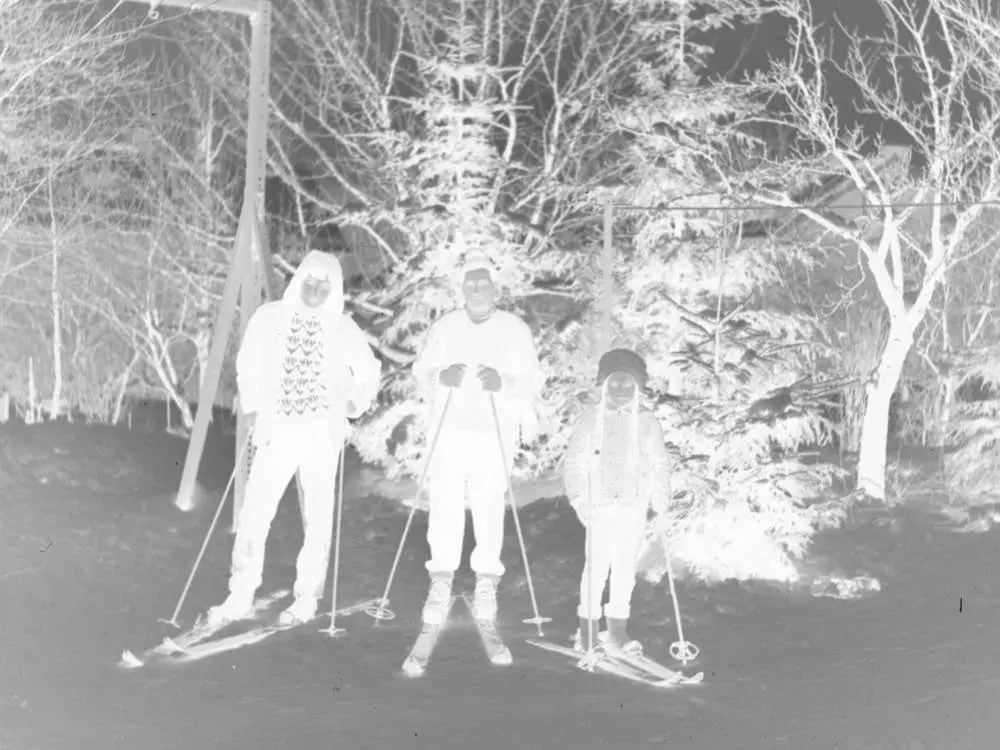
Tonal value conversion means the conversion of a negative image to a positive image. It is the significant first step in the scanning of negatives. During this first step, the negative in reversed, this means bright areas become shadows and shadowy areas become bright. The result is a positive image.
A film’s orange mask contains information on the three color channels of the respective film and their gradation in compressed form which has proven to be of advantage for the development in the darkroom. This information needs to be decompressed properly during conversion when a color neutral image is desired. When the orange mask is not considered or considered incorrectly during conversion, the resulting positive has a color cast; the positive may appear low-contrast or have lost details in its lights and shadows. Basic tonal value conversion is meanwhile available in a lot of programs. Correct orange mask conversion on the contrary, is something that only specially designed tools can deal with.
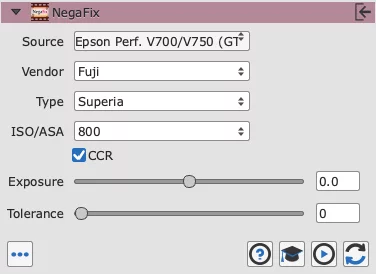
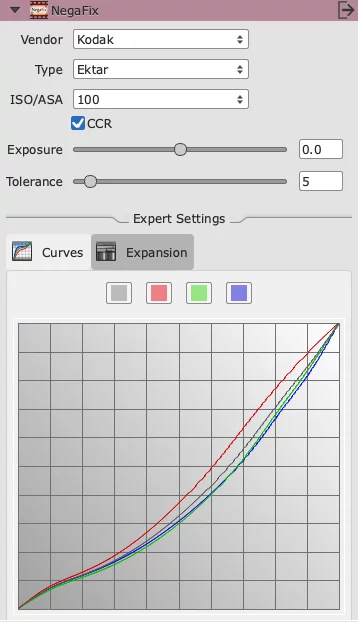
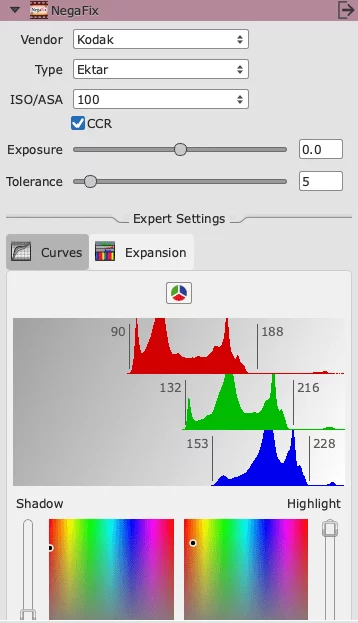
NegaFix is one such tool. The NegaFix dialog offer a selection of typical film profiles that simplify the scanning of negatives. These profiles are generated individually film for film for every scanner in order to establish an ideal starting point for further image editing. Additionally, it is also possible to perform a color cast removal on the still unprocessed negative data so that the color cast does not convert into the positive image. Along with special film profiles, there are general and monochrome profiles for tonal value conversion. The general profile can be used if there is no specific film profile.
During the development, film strips go through multiple development baths. The development process concludes with the fixing bath. However, it is important to note that the fixing bath only slows down a film’s development, it does not stop it completely. As a result, chemicals in the film continue to react with one another and the negative slowly continues to change. In order to compensate for the occurring fluctuations, SilverFast Ai Studio offers the option of adjusting available profiles and generating one’s own individual profiles.
The Wilhelm Imaging Research Institute has thoroughly investigated the longevity of a wide-variety of films. The results are not pretty. Take a look for yourself at the following study to see how long lasting film really is: Wilhelm Research – Study of Film Longevity (Excerpt from: The Permanence and Care of Analog and Digital Color Photographs, By Henry Wilhelm, Carol Brower Wilhelm, Kabenla Armah, and Barbara C. Stahl, ©2011 and ©2013 Wilhelm Imaging Research, Inc. Grinnell, Iowa, U.S.A.)
Negative film offers several further advantages over positive film. Negatives have a larger dynamic range than slides. This means that negatives can show color values of a higher grade, while dias usually show clearly higher color saturation and a steeper gradation curve. Thus, many negative films are well suited for specific looks because a higher dynamic range also means that the film allows for more aperture, overexposure and underexposure. The dynamic range that the film can portray is thus very large.
A well-exposed negative film can exhibit extremely high density. Therefore, we recommend the use of Wielokrotna ekspozycja. Multi-Exposure increases the number of contrast levels, that were recorded during scanning. As a result, more gradations are available. Moreover, the maximum dynamic range remains. Even when the results are not always immediately visible on the computer monitor, SilverFast’s Multi-Exposure tends to consistently double the original amount of fine color-value gradations available – an important quality factor, especially if you want to further edit your images or print in large format.
Today, negatives are highly valued by enthusiasts and analog photographers. Whereas slides, which in the past enjoyed a lot of popularity due to their quick development time, are no longer popular. We of course also have the digital camera for images that need to be accessed quickly. While on the other end of the spectrum, it can be said as a rule of thumb that those who practice analog photography must have the required patience as they wait for the enjoyment of their photos. And it is of course needless to say that these long-awaited photos should be digitalized in the highest possible quality, preserving them for life-times to come.
Although the repro-workflow for imaging editing normally begins with the setting of lights and shadows in the image, when working with negatives, the exposure is first and foremost adjusted. In the NegaFix-dialog, there is an exposure regulator that can simulate the adjustment of exposure up to three apertures in either direction according to the selected film profile. The exposure of the scanner isn’t touched by this method. The exposure is then adjusted by NegaFix so that lights aren’t burnt-out and details in the shadows are clearly visible.
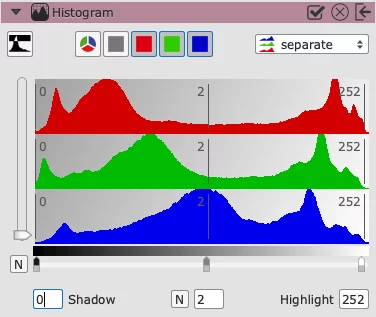
In the input-histogram, the distribution of image data remains unchanged. The output-histogram illustrates how all image details are shifted; when the exposure is decreased, the dark tones are stronger and when the exposure is increased, the bright tones are stronger. The data spreads out between the two extremes, dark (value 0) and bright (value 255) and nothing is cut off on the margins. All image details remain. Only thereafter is the brightness determined via the brightness regulator in the histogram, either manually or with automatic image optimization.
Color cast negatives are no rarity. If after the tonal value conversion, a color cast remains, you can remove it quick and easy with the Neutral Pipette. One click on a point in the image with the Pipeta neutralna removes a simple color cast. Neutral means that the point has the same values for R, G and B. Concrete is a good example for a neutral point. For example, when the last value is increased (135/135/150) this is an example of a blue color cast. After using the pipette, the three values for RGB are on the same level. A complicated color cast can be repaired with up to four neutral points in Ai Studio.
Fortunately, dust and scratches are much easier to remove from color negatives than from black-and-white film or Kodachrome images. When working with color negatives, the dust and scratch removal tool iSRD performs an infrared scan using the scanner’s infrared channel. In the majority of cases, it is fully sufficient to simply activate iSRD.
Sebastian Schlüter: In this video tutorial I show you my color negative scanning workflow. It is a two part workflow using LaserSoft Imagings SilverFast 8.5 and Adobe Lightroom. The intention was to show you how you can get beautiful scans similar to Fuji Frontier lab scans with your consumer scanner at home. I use a Epson V700 and get very nice results.